Sage CRM Exchange Integration: Sage CRM Setup
Sage CRM offers Exchange/Office 365 Integration which allows you to synchronize Contacts, Appointments and Tasks between Sage CRM and Exchange/Office 365. This article will guide you through setting up the integration in Sage CRM.
Sage CRM offers Exchange/Office 365 Integration which allows you to synchronize Contacts, Appointments and Tasks between Sage CRM and Exchange/Office 365. This article will guide you through setting up the integration in Sage CRM.
Prerequisites
Please note that this article assumes that you have already set up an Office 365 or Exchange account for integration. If not, please view these articles on how to set up the necessary account:
- Office 365 account
- Exchange account: no article yet
Setup Sage CRM Users
In order for the integration to work for users in the system, we need to make sure that all users have the correct email addresses.
- Navigate to Administration -> Users -> Users
- Find all the users
- For each user repeat the following:
- Open the user
- Click Change
- Update the E-mail field to the user's email address
- Save your changes
Enable Exchange Integration
Before we can link Sage CRM with Office 365/Exchange, we need to enable the Exchange Integration feature in Sage CRM.
- In Sage CRM, navigate to Administration -> System -> System Behaviour
- Click Change and update the Use Exchange Server Integration field to Yes:
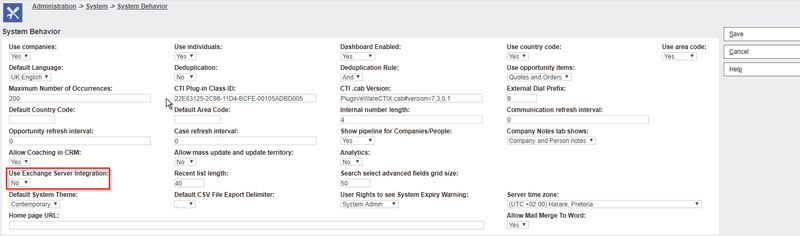
- Click Save
Configure Exchange Integration
We now need to configure the Exchange Integration to communicate with Office 365/Exchange.
- Go to Administration -> E-mail and Documents -> Exchange Server Integration -> Connection Management
- Click New in the right to create a new configuration and populate the fields as follows:
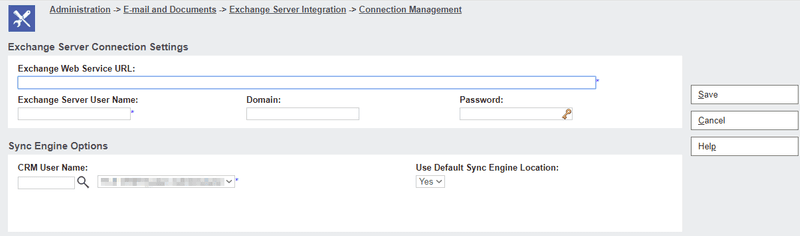
- Exchange Web Service URL: The URL to the web service for Exchange (if you are using Office 365 then you can just use https://outlook.office365.com/ews/exchange.asmx)
- Exchange Server User Name: The username of the Exchange/Office 365 user to use to log in (this is the user you configured impersonation rights for)
- Domain: If using an Exchange server, enter the domain if applicable
- Password: Enter the password for the specified Exchange user defined in Exchange Server User Name
- Populate the CRM User Name field with the user that is responsible for the synchronization (you can usually just use the admin user)
- Save the changes and you should see the following success screen:

- Navigate to the User Mailbox Management tab and click Change
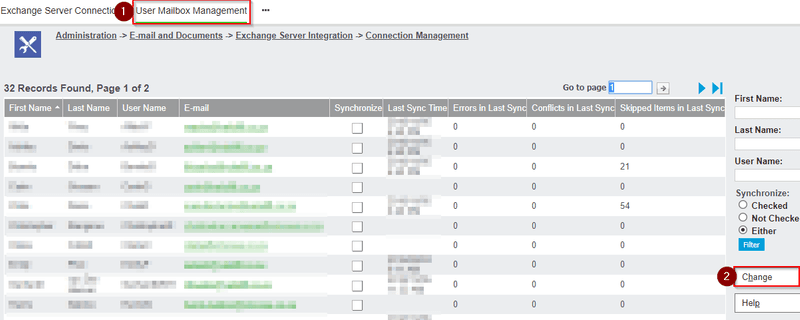
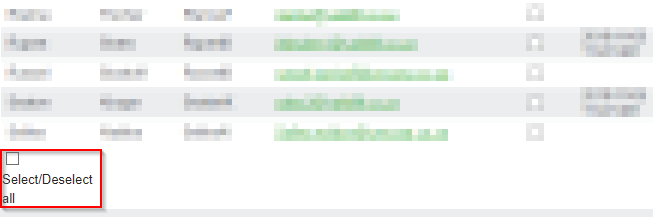
- Check the checkboxes in the Synchronize column to enable integration for the necessary users. There is a Select/Deselect all checkbox that can assist you:
- Click Save to save the changes
- Go back to Administration -> E-mail and Documents -> Exchange Server Integration and then navigate to Synchronization Management.
- Configure the sync options according to your needs.
- Click Enable to start the sync:
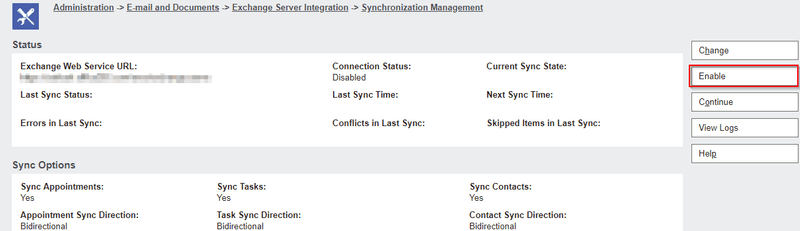
Be warned the first sync might take some time.
Conclusion
If all went well, then your integration should be running smoothly. Please leave a comment if you have any further questions or issues.
Disclaimer
I cannot be held responsible for any damage done to your system while following the above steps. Please follow them at your own risk and be aware of the consequences of your actions.
Repost Notice
This article is reposted from my original article on the Astech website.